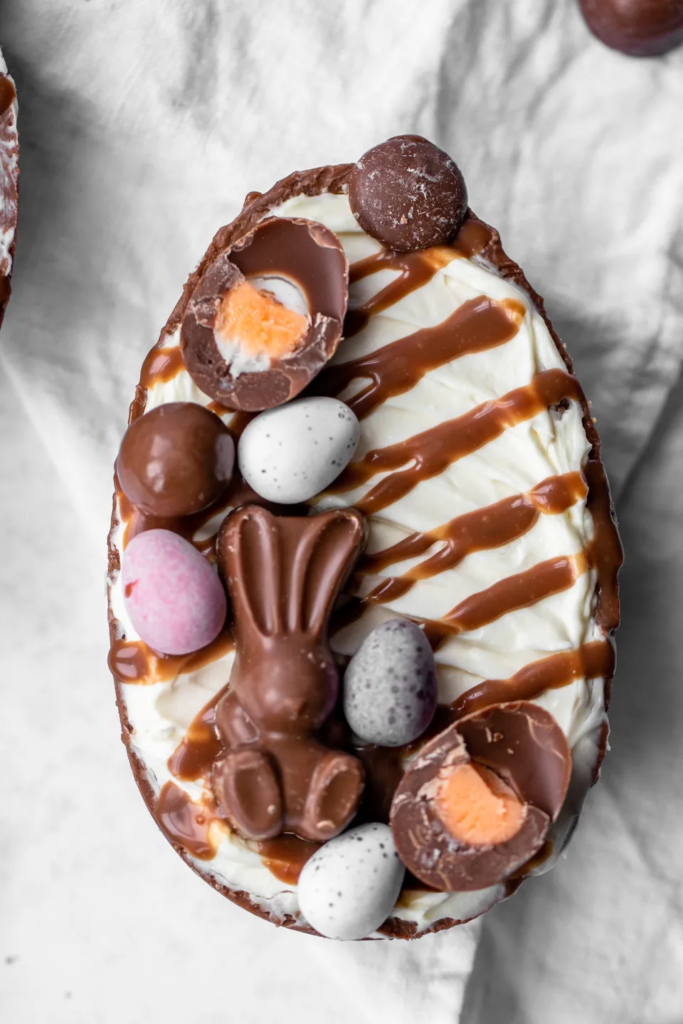
What sounds better than an Easter egg cheesecake? Nothing, right? Exactly. This sounds like the perfect treat that everyone in the family, or your friend group, will enjoy eating and is so fun and creative to eat!
It is getting to the time of year when flowers are starting to grow, and you wake up to the birds singing every morning, and the cool April sun is shining through the window. Easter eggs are beginning to fill the shelves, and we hear kids discussing what type of egg they are getting this year.
But do you ever consider doing something more creative with your Easter egg this year? Maybe breaking it in half and putting any cheesecake you could dream of- wait for it- inside the egg! Even the thought of this sweet treat makes my mouth water and my taste buds tingle.
These delicious Easter egg cheesecakes do not take long to prepare, do not require any cooking and only 2 hours in the fridge! 2 hours may seem a lot, but trust me when I say they are 100% worth the wait.
Easter egg cheesecake- ingredients!
It does not take too many ingredients to create this flavourful cheesecake egg, but here are the required ones!
hollow chocolate Easter egg
75g digestive biscuits
25g butter, melted
75g mascarpone
100g soft cheese
2 tbsp icing sugar, sieved
2 tbsp cocoa powder, sieved
100g double cream
optional (for service)-
Easter treats, such as mini chocolate eggs or crumbled chocolates
Caramel sauce or cooled melted chocolate
Easter egg cheesecake method!
Start by separating the Easter egg in half, either by carefully breaking it down the middle or using a hot knife to run down the seem of the egg. This will also prevent the egg from cracking if done carefully! This step is tricky, so be careful while doing it!
Next, we are onto the biscuit base; weigh out your digestive biscuits (if you want to make your cheesecake lotus biscoff flavour, you should use biscoff biscuits instead of digestive!) and put them into a fridge bag. Then, crush the biscuits up using the end of a rolling pin until they are like bread crumbs!
Then, weigh out your butter and melt it in a small pot, then stir it into the biscuit crumbs until the crumbs look slightly like damp, golden sand! I know it is a strange way to describe it, but it’s the right way!
Allow this to cool so that once the base is added to the egg, the chocolate egg won’t melt! However, do not let it harden, but this would take a while to happen! While waiting on base cooling, you could start the cream or clean up a bit!
Next step for our Easter egg cheesecake-
Spoon this into the Easter egg halves, but only go about a quarter up and pack down gently using the back of the spoon. Chill these halves of the eggs in the fridge until needed again.
Mix the mascarpone, soft cheese, icing sugar and cocoa in a medium bowl with a wooden spoon until smooth. In a separate bowl, beat the double cream to soft peaks using an electric whisk. Then, gently fold the whipped cream into this mix, then carefully spoon the cheesecake filling over the chilled biscuit bases in the Easter eggs.
Smooth over and level the surfaces of the eggs with a knife, then chill for at least 2 hrs or overnight until firm and set.
Once set, it is time to decorate! Scatter the set of cheesecake-filled eggs with mini chocolate eggs, or other Easter treats, then drizzle with caramel or melted chocolate to serve.
For more Easter treats, click here!
For articles and reviews, click here!
That is your Easter egg cheesecake ready and time to be enjoyed!

